FTP Uploading Webfiles for Windows Hosting
FTP Uploading Webfiles for Windows Hosting

Support Team
Created: 05/04/2021 2:50 PM - Updated: 10/03/2022 2:45 PM
FTP Filezilla for Windows Hosting Customers -
This article explains how to configure FTP Access to upload and download files from your website directory, using a FTP Account you may have setup yourself, or has been setup for you by 123 Simples.
FTP stands for File Transfer Protocol and provides you with an easy and fast way to upload and manage your website files. We advise you to use FTP instead of our file manager due to the following benefits:
1. Drag and drop file upload;
2. Upload as many files at once as you wish to;
3. No need to login to your Hosting Control Panel to upload files;
4. Easier to Rename, delete and chmod files by right clicking on the uploaded files
Before you can upload files to your webspace, you will need an FTP client (software) installed on your own computer, which will allow you to connect to our FTP Server. We recommend Filezilla which is a FREE opensource multi-platform FTP client software.
STEP 1: Download and install Filezilla on your own computer.
Download FileZilla Client for Windows (64bit)
Download FileZilla Client for Mac OS X
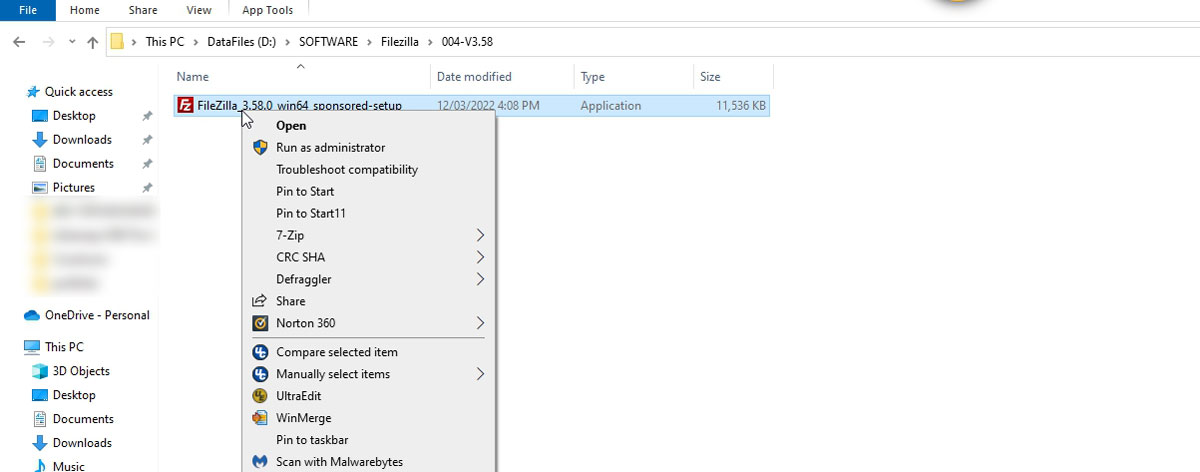
When you have downloaded the file, right hand click on the zip file and choose Extract All. This will unzip the file contents into a separate folder, allowing you to install the program. Open the extracted folder, then right hand click on the Filezilla application and choose Run As Administrator.
Depending on any software program it may offer you the chance to use a Custom Install. We ALWAYS do choose this option ourselves so we can review exactly what is being installed and where. Some opensource programs may include optional extras that you do not need, or wish to have. Choosing Custom Installations always is the best option.
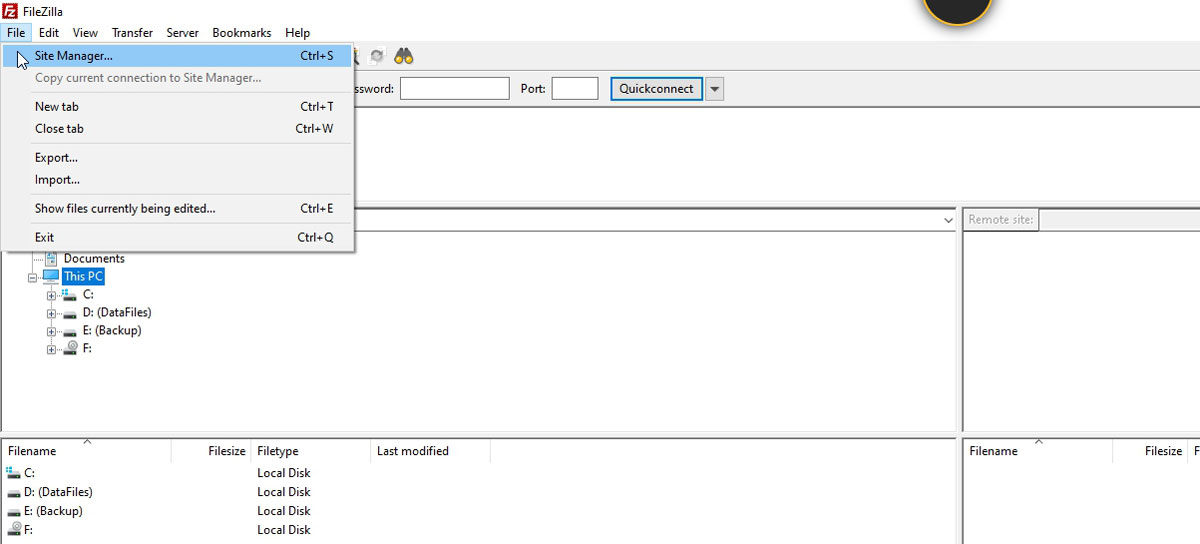
STEP 2: After installing Filezilla run the program. When it first opens it may ask you to define a website, or FTP setting. If it does not, then at the top of the screen you will see the words File, Edit, View, Transfer etc. Choose File and then select Site Manager.
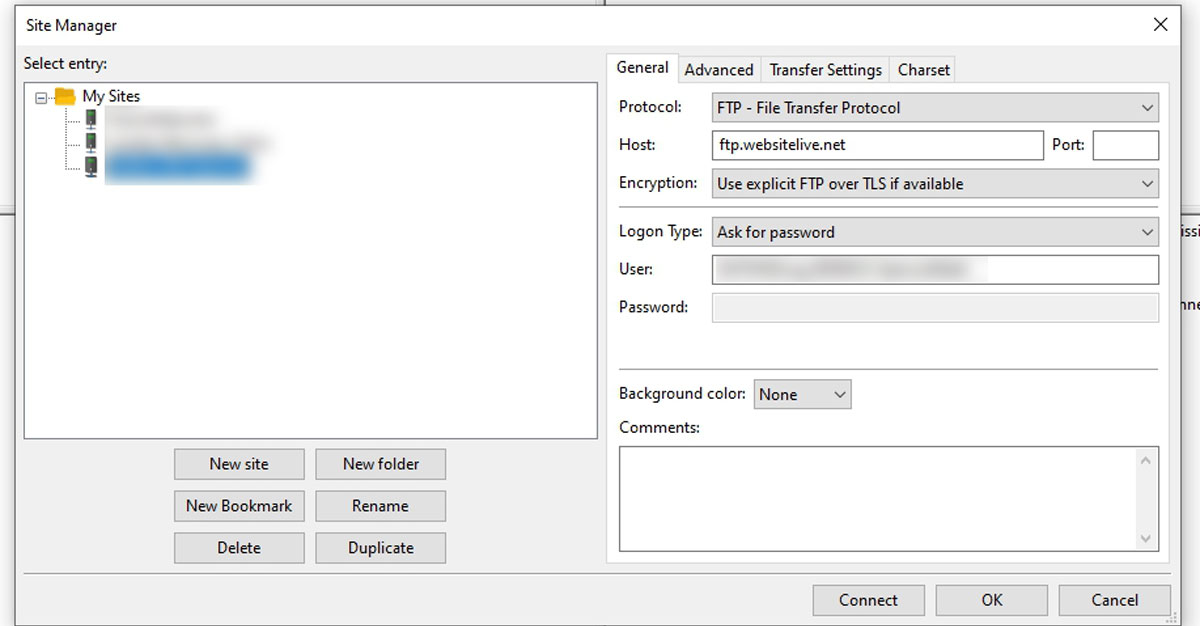
STEP 3: The Site Manager window will open. Click New Site, and where it then says New Site highlighted in blue, change this to a meaningful name for your site - example: Wedding Bells.
On that same window (Site Manager) you have 4 tabs - General, Advanced, Transfer Settings and Charset. We only need to complete the entries on the first two tabs marked General and Advanced.
Tab marked General
Host: ftp.websitelive.net
Protocol: FTP - File Transfer Protocol
Encryption: Use explicit FTP over TLS if available
Logon Type: Normal
User: This will be your FTP Username as you or we setup for you
Password: This will be your FTP Password as you or we setup for you
Tab marked Advanced
Default Local Directory: the directory folder on your local computer
Default Remote Directory: domainname.co.uk/wwwroot/
Click OK to save these settings.
STEP 4: Connecting to the FTP Server is now setup. All you have to do now is go to the Site Manager, and click Connect. This will connect your computer to the FTP Server.
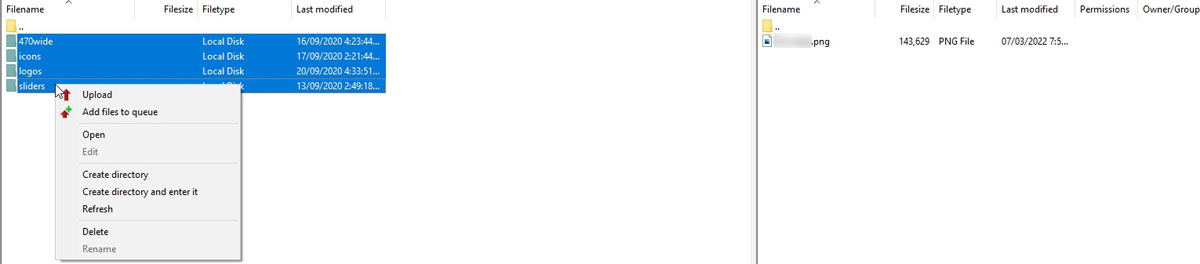
Uploading webfiles to the server is fairly straight-forward. You should see 4 windows - on the left hand side is your local computer files. On the right hand side is the server files.
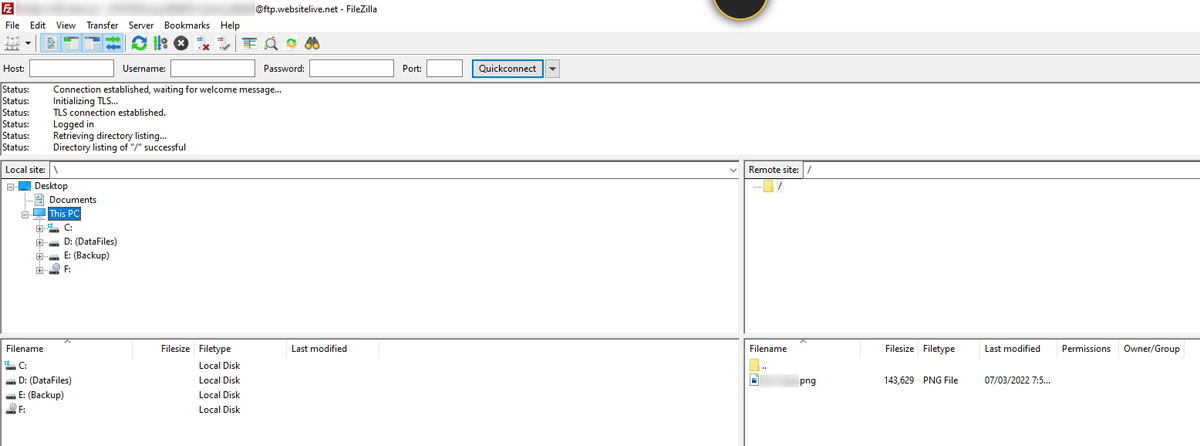
Choose the files and folders you wish to upload from the left hand window, then either RIGHT HAND CLICK the files and choose Upload, or left click and Drag the files over to the right hand window. This will also upload the files to the directory.
Once your files are uploaded, they will be accessible via any web based browser.