Changing Outlook Connection Settings from Windows to Linux
Changing Outlook Connection Settings from Windows to Linux

Support Team
Created: 12/03/2023 12:58 PM - Updated: 13/01/2024 2:43 PM
Changing Outlook Connection Settings from Windows to Linux -
This article explains how to change your Outlook connection settings from our windows servers to our linux servers on the computer. If your hosting server connection settings have changed (for example because we have switched your web hosting from our windows servers to linux servers) then this page will give you some idea how to edit the email account concerned, and setup the new connection details for your email account using the different server.
You need to have Outlook installed on your computer
Once the server changes have updated online, then you will notice an error come up on Outlook saying it cannot connect to the server. Follow the instructions we have sent you in an email, and use this page as a guide to what you should see on your screen or monitor.
Step 1 - Open Outlook on your computer
Depending on how Outlook is setup to send and receive emails, it may try to connect to your email address and throw up an error. Just click Cancel. Outlook will finish sending and receiving on the email accounts that are working. If the error has come up, then it is time to change the connection settings for the email address concerned. To do this, follow these instructions.
With Outlook still open
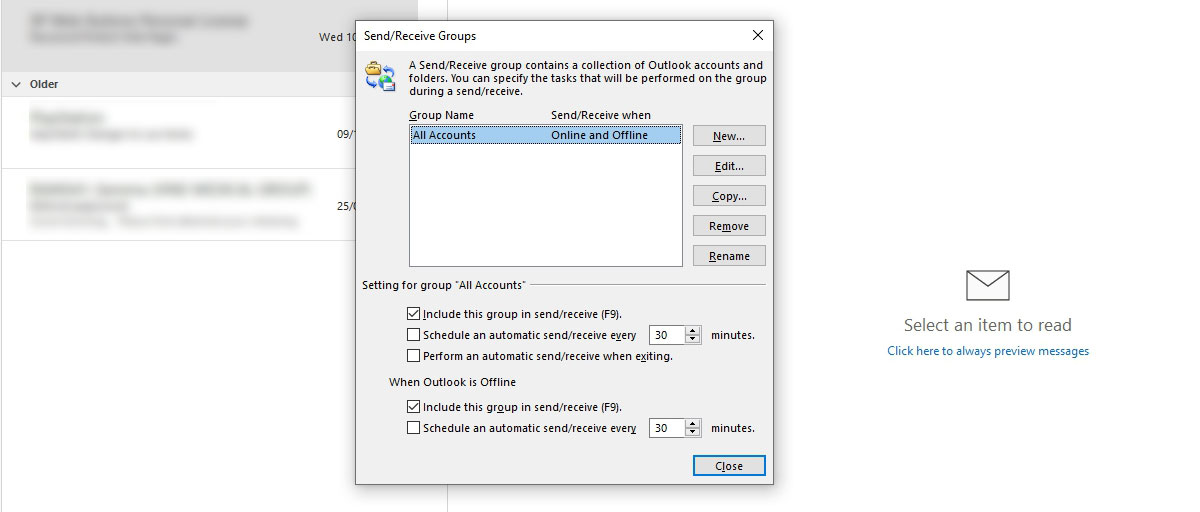
With Outlook still open, on your keyboard press and hold down BOTH the Ctrl and Alt keys at the same time. With these still pressed down, then press the S key on your keyboard (the letter S). When you do this it will open a new window called Send/Receive Groups.
Step 2 - Edit the email address concerned
All accounts under the Group name should already be highlighted in blue. Down the right hand side you will see the choices New, Edit. Copy, Remove and Remain. LEFT CLICK or choose Edit. It will open up another window called Send/Receive Settings All Accounts.
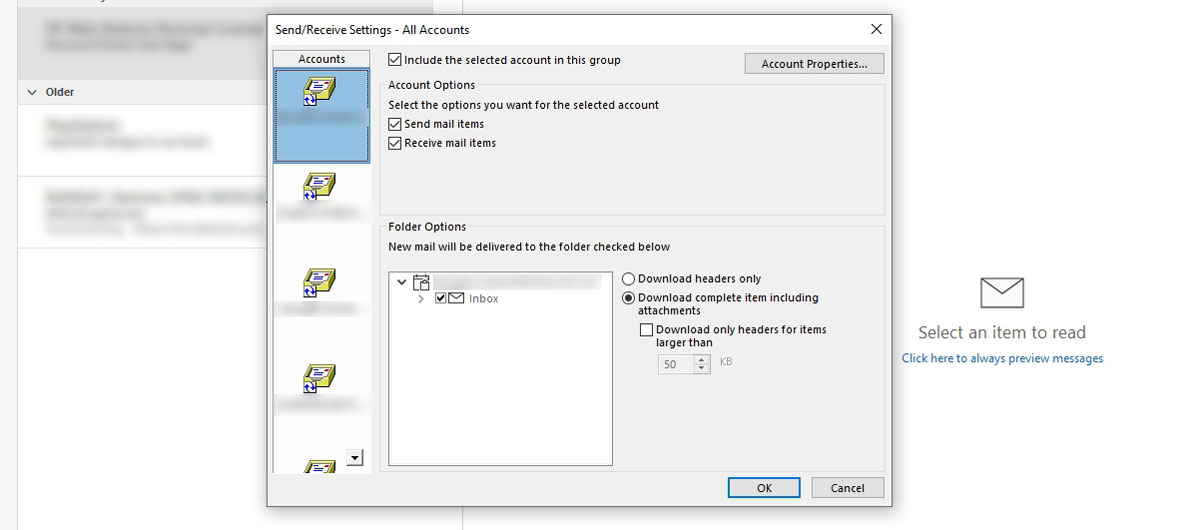
Depending on how many email accounts you have, it will always show the DEFAULT EMAIL ACCOUNT first. If this is not your email account as shown above, then scroll down that list until you see your email account. The account box must be clicked on once to highlight it in blue and if you just look under the box called Folder Options make sure that it is your email address showing - so for example sue@yourdomainname.com.
If you are happy that you are on the correct email account, then click on Account Properties in the top right hand corner.
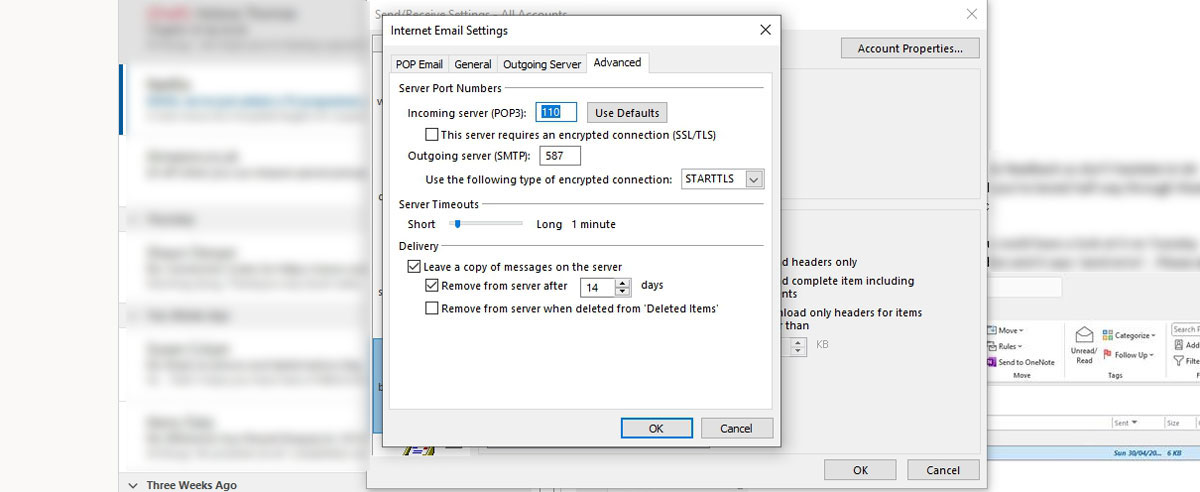
Step 3 - Changing the server connection settings
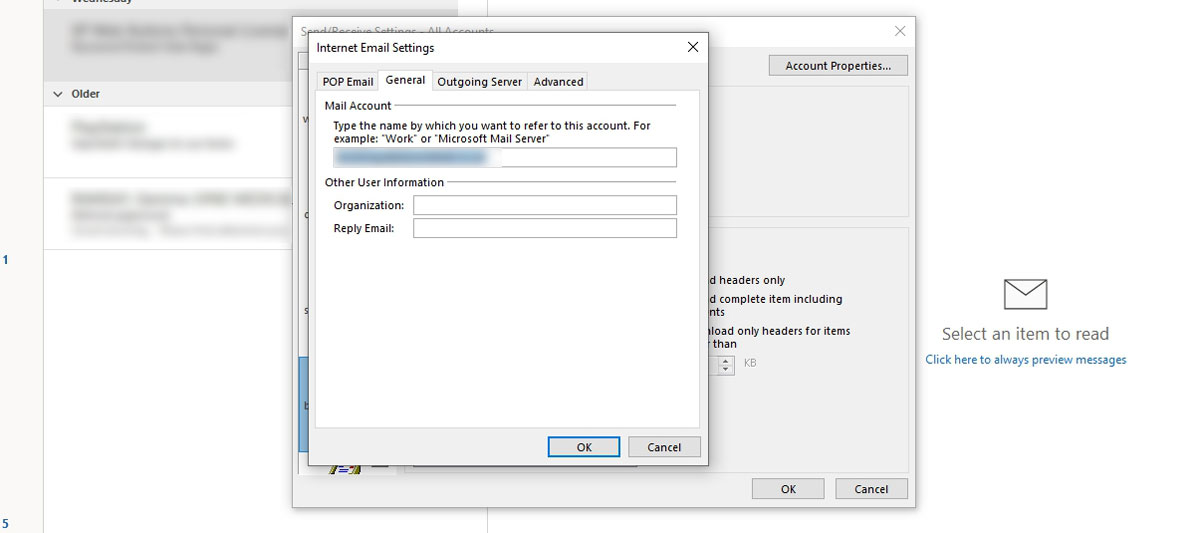
Internet Email Settings
On the pop up window (as shown below) you should see 4 tabs - POP Email, General, Outgoing Server and the last tab is called Advanced.
We're going to go through one tab at a time:
POP EMAIL -
All you have to change here are the two boxes under Server Information.
The incoming mail server POP3
Replace pop.WebSiteLive.net WITH mail.yourdomainname.com
The outgoing mail server SMTP
Replace smtp.WebSiteLive.net WITH mail.yourdomainname.com
Your email address and password do not need changing!

GENERAL -
You shouldn't have to change anything here but it's good practice just to make sure you have the right email address. If for some reason you suddenly see an email address that is NOT THE ONE YOU WANT TO BE EDITING, simply click Cancel on all the tabs and restart from step 2. But we're confident it is, so let's carry on.
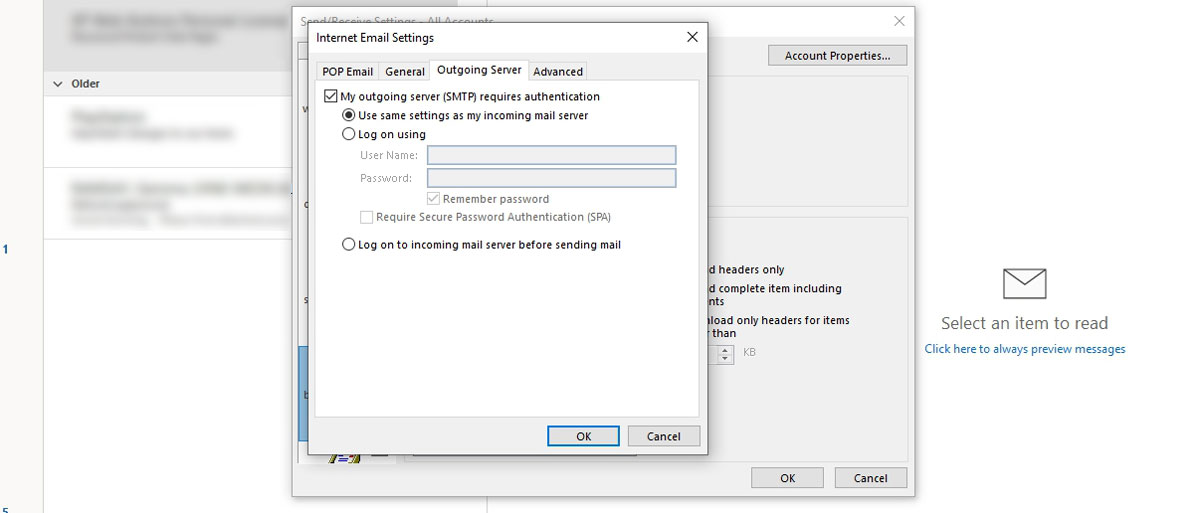
OUTGOING SERVER -
Again these settings should be fine with no need for you to make changes on this tab.
ADVANCED -
On the advance tab section there are Server Port Numbers and Delivery.
Incoming Pop Server (POP3) 995 CHANGE THIS TO 110
Untick this server requires an encrypted connection (SSL/TLS)
Outgoing Server SMTP 25
Use the following type of encrypted connection None
If Port 25 on the outgoing email stops working, then use these settings for the Outgoing Server:
Outgoing Server SMTP 587
Use the following type of encrypted connection STARTTLS
UNDER THE DELIVERY SECTION
Leave a copy of messages on server ticked
Remove from server after 14 days ticked.
Step 4 - OK the server connection changes
Click OK to save and close the window Internet Email Settings
Click OK to save and close the window Send/Receive Settings All Accounts
Then click Close on the Send/Receive Groups window.
You should now be able to send and receive email on that account again.